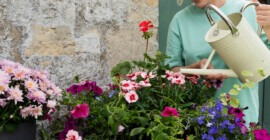
It can be hard to think about spring when we are starting to feel the autumn chill and are now frequently reaching for our heavy coats. However this is the ideal time to start next year’s preparations.
Spring for gardeners doesn’t really begin in March, it starts in September. This is down to the choices made in relation to what you plant and where. This is the perfect time to select which flowers you would most like to see blooming when springtime does finally reappear.
Most bulbs are suited to container planting, however those that make the biggest impact are the larger, more impressive flowers such as tulips, lilies, crocuses, irises and alliums.
Bulbs can be planted throughout the seasons of autumn, spring and summer, when to plant depends on the variety you have purchased. If you are not quite sure when planting should commence check out the packet labels to find out which is the best time of year for your particular bulbs to be planted. Unwins have a variety of Autumn Planting Bulbs for you to browse through helping you to decide upon your glorious springtime garden.
For beautiful displays, you could choose one flower variety per container for a strong single colour or you could plant various bulbs that will bloom simultaneously within the one pot. This method is also known as ‘Lasagne Planting’. It is created by planting the largest and latest to bloom first, i.e. nearest the bottom of the pot working your way up – continuing your layering of bulbs. Finally you should be planting the first flowering bulbs closest to the top of the pot. With this planting method you should have a container which will continue to bloom all through spring.
If you are still unsure then follow our step by step guide on how to create a wonderful display;
Step 1
Find an attractive container and place a layer of Westland Potting Grit at the bottom to encourage drainage.
Fill the container with Westland Bulb Planting Compost. Push bulbs in three times their depth and ensure you place one bulb width apart. Plant with the pointy nose end upwards. Continue with layers of compost and bulbs.
Step 2
Water regularly to ensure the compost won’t dry out, however be careful you don’t overdo it as the bulbs won’t like to be swamped in water.
Feed every 8-10 days with a high potassium feed, such as Westland Big Tom Tomato Food. Begin feeding when shoots appear and stop once the leaves start to wither at the end of the season.
Step 3
Bulbs in pots and containers tend to need a little more care than those planted in our beds and borders. When you have completed the potting stage, make sure you are placing the pots / containers in an area that gets sunlight, but also in a location where squirrels can’t reach them. If the weather gets particularly cold, wrap the pots in an old blanket or towel.
Once the leaves start to wither at the end of the season, allow them to die off naturally, then gently cut them off around 12 cm (5 inches) up the stem with a pair of scissors and leave in pot, ready to flower again the following year. This allows carbohydrate stores to build up as the food store for the dormant period.
Move the pots to a cool spot like a garage, garden shed or even a basement until they are ready to flower again the following year.


